 Most kids know the basics about recycling, but to take it one step further and make the process a little more real for kids, I decided to actually show a group of first graders how it works. Project for the day: making paper!
 It is actually fairly easy to turn leftover paper into new paper. It was so successful, my son wants to know if we can stop buying paper now. Hmm... I'm not sure my paper is good enough to run through the printer yet, but I did agree we could start doing it for homemade cards.
Supplies: paper, frame/screen, water, large plastic tub, blender, dull knife
1. The first step is to buy, find, or build a frame with a screen. I actually had a paper making kit from years ago that came with screens. I found a few kits on the market today, but the reviews I read were questionable so you may be better off buying screens at a local craft store or building one yourself with supplies from a hardware store. To build one, you just need a basic wood frame and a screen to staple to it. Here is a picture of my screens.

2. Dig into your paper recycling container and pull out about 15 sheets of scrap paper. Any color will work, but you might want to think about what color paper you want in the end. I used mostly white with a few colored sheets. Newspaper can work if you're okay with grey-colored paper, but stay away from any glossy paper.
3. Rip the paper into approximately 1 inch squares. This seemed to be great fun for kids!
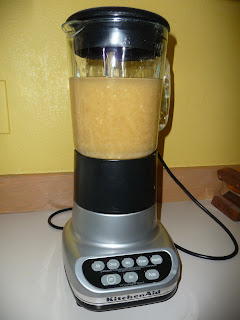
4. Put the paper scraps and four cups of water in a blender. Blend until it looks like a soupy pulp (no big scraps left). I did about 5-10 seconds on low and 30 seconds on high.
 5. Pour the mixture into a large tub. I used an old plastic toy bin, but lots of things could work. Repeat step 4 until all of your paper has been turned to pulp.
 6. Add enough water to the tub to make it a few inches deep.
7. Submerge your frame in the pulp with the flat side of the frame on top. Lift it directly up out of the water. Hold over the tub until the water has drained.
8. Dry the paper. My kit says that the frames can be cooked in the oven for 20 minutes at 250 degrees, but they weren't quite dry at that point. Also, if you're making your own frame, you might not know if it is able to withstand the heat of the oven. Sunshine for a few hours seemed to be the best method. A hairdryer can speed up the process, but be careful not to get too close to the screen or you can burn a hole in it!
9. Use a dull knife to separate the paper from the screen.
We added some glitter to the pulp, but lots of decorations (dried flowers, confetti, etc.) could be added for embellishments. It is a fun project with kids and gives them a chance to learn about recycling beyond throwing it in the right container.


I think this is a great idea. It could be a great way to make holiday cards or birthday cards. Debbie
ReplyDeleteI heard about someone adding flower seeds to their paper, making them into cards and giving the instructions to plant the entire card!
ReplyDeleteGreat project! I love that it teaches kids what it really means when it says "recycled paper."
ReplyDeleteWell done! It is a good project for kids and it helps the environment. Excellent photos to guide you through the process and to see finished product. Congratulations on you Blog which is quite a helpful spot and will be a great way to preserve memories like an electronic scrapbook.
ReplyDeleteAMLD
Speeking of making paper with seeds in it to plant, I saw a few websites that offer products that have just that. Self Magazine, May 2009, listed a few of them. FlowerSeedPaper.com shows gift bags. PorridgePapers.Etsy.com shows gift boxes, and PlantablePapers.com shows paper. All of these have seeds in them. When the product is no longer usable, just put them in the ground and watch it grow.
ReplyDeleteI think adding seeds would make a great project for the kids.
Do you just add the seeds in with the pulp?
ReplyDelete